 My friend and I were driving down the road the other day when he turns to me and tells me that there is this website with links to great extranet security products for SharePoint and even links to SharePoint Training. I had to check this out for myself! “What’s the site?” I ask. “Oh, its http://216.215.157.252” To which I reply “Cool, I’ll look that up as soon as I get home… if I remember it!”
There is a reason we have DNS: it is so we can make things easier to remember. There was no way I was going to be able to remember http://216.215.157.252 unless I put it into a song (is 86753O9 going through anyone else’s head right now?)
You see, despite what Juliet may tell you, names are important. Sure a rose by any other name would still be as sweet, but the florist still gives me strange looks when I ask for a dozen #F80000 roses. You do not go around treating people as if they are storm troopers and asking "TK-421, why aren't you at your post? TK-421, do you copy?", so why would you treat your SharePoint web apps like they are storm troopers?
Give your SharePoint web apps names by configuring Host Headers.
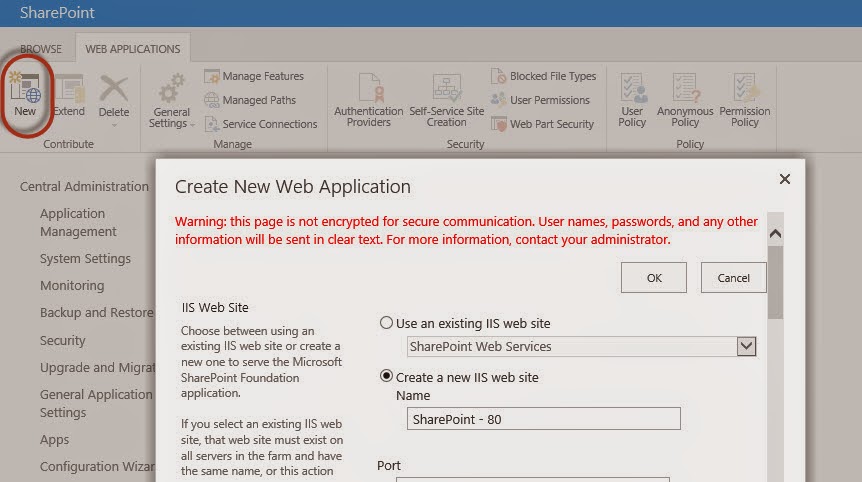
To get started, click the “New” icon from the Web Applications ribbon and you will see the “Create New Web Application” dialog box.
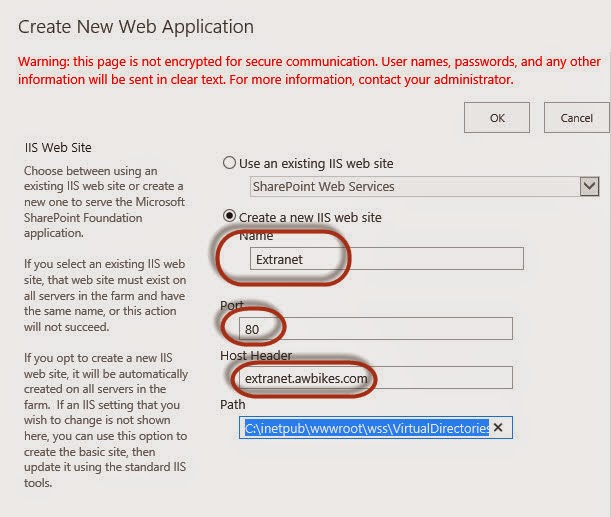
In the “Name” field, type a name that is meaningful to the type of web app you are creating. In this example, we are creating a new extranet web app to be used with our Extranet Collaboration Manager product. For the “Port” field, you will want to type in “80.” Port 80 (or 443 for SSL) allows you to use a friendly name, without having to specify the auto generated port number SharePoint generates by default.
Tab down and type in the “Host Header.” In this example, I have typed in the URL as extranet.awbikes.com, as I want this to be the URL that is typed in when people wish to get to my extranet. I will then TAB DOWN to the next field. By tabbing down to the path, it will automatically be updated with the correct information for me.
Continue filling out the rest of the Web App information and click “Save.” This “shouldn’t take long!” If you try to browse out to your site now you will get:

So, what happened? Well, if you are on a personal sandbox, we still need to update the host file so that it knows where to go when the URL is entered. If this is a production, QA, Dev., or anything accessed by other users not logged into that server, you would need to add the entry into your company's DNS.
Continue filling out the rest of the Web App information and click “Save.” This “shouldn’t take long!” If you try to browse out to your site now you will get:
So, what happened? Well, if you are on a personal sandbox, we still need to update the host file so that it knows where to go when the URL is entered. If this is a production, QA, Dev., or anything accessed by other users not logged into that server, you would need to add the entry into your company's DNS.
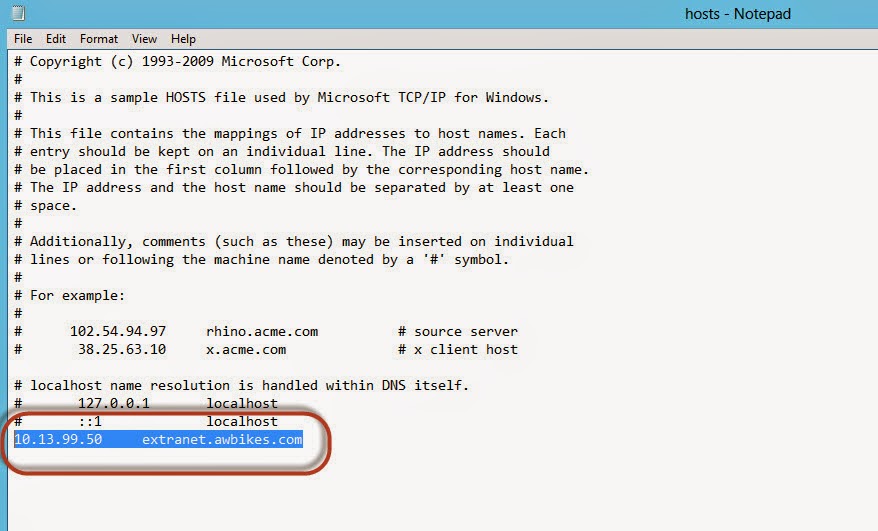
To adjust the host file we need to navigate out to c:\windows\System32\Drivers\etc and open the “hosts” file. In the hosts file you will need to add the IP address of your SharePoint server and the Host Header name. In my example I typed extranet.awbikes.com and the IP address of my SharePoint server is 10.13.99.50 so my hosts file will look like:
Once I save the hosts file I can then browse out to extranet.awbikes.com and see my log in page for my extranet.
Once I save the hosts file I can then browse out to extranet.awbikes.com and see my log in page for my extranet.
This can be very beneficial to your clients, but also can help with Dev. environments as well. If I had a dollar for every time I configure a new web app for a test and ended up using it for longer than expected, only to forget which numbered path correlated with the web app I was working with… well, I could buy the office a cup of coffee. Get in the habit of configuring Host Headers every time and avoid some frustration later on!
No comments:
Post a Comment